Showing posts with label Elegant Cards. Show all posts

Tuesday, March 19, 2013

A Little Emerald Love

Hey all! I’m popping up with a number I made for this week’s Trigger Tuesday Challenge. In case you didn’t know, emerald is the color of 2013. Initially, I was hesitant to embrace it, but I really love it know. As many of you know, I work in retail and we have a lot of emerald pieces that I love. I would totally recommend picking up a few pieces because I find that it can be a very versatile and neutral color.

Elegant Emerald

I love the inspiration picture that Cath picked for the trigger. I especially love the ruffled top and the floral pattern of the dress. So, for my card, I tried to play that up.

DSCF2249

DSCF2243

DSCF2247

DSCF2246

I pulled out what is probably my favorite stamp set, Rosie Posie, and stamped a few blooms. I am sooooo happy that I didn’t get rid of my Jenni Bowlin Seed Packet ink pad. It’s the perfect shade of emerald. And, I also need to thank my dear friends Jess and Sara because if not for them, I would have never bought the huge package of glitter that just so happened to include . . . you guessed it, emerald. Woot, woot!

I made the crepe paper trim myself. I probably went a bit overboard, but I don’t care. For me, sometimes, more is more.

Alright peeps, that’s it for me today! You have about five more days if you want to join in on the fun! Thanks for stopping by and have a blessed day!


Wednesday, September 26, 2012

Victorian Halloween

Good day wonderful people! I have another one of my vintage numbers to share with you all today. As I type this, I have the urge to add some glitter to it, but what’s done is done!

DSCF0338

DSCF0340

Okay, so I challenged myself to make a Halloween card without using traditional colors, and to also use some of the things that I’ve been hoarding. I’ve been on a bit of a, I need to buy this and this and that phase, and, I have to kind of lay off the buying because I’m going on vacation in November. Moving on!

For the first time in a long time, I made an odd sized card. The base is Sweet Blush and measures 3.75” x 5.5.” I basically made an A2 and shaved half an inch off. That keeps you from wasting cardstock.

All of the patterned papers are for Colorbok. I bought the Victorian Parlour 8” x 8” pad and the die cut accents from Jo-Ann this summer. Basically, I just picked some patterns that coordinated, starting with a brown scroll type pattern. I stamped Background Basics: Sheet Music with Crumb Cake ink on the pink doily paper. I wanted something a bit subtle. I stitched the papers together and then adhered them to the base.

I found some new (Well, new to me!) doilies at Jo-Ann a few weeks ago, and it' wouldn’t be one of my cards if I didn’t use one, so I took one out and gave it a misting with Boss Lady Mr. Huey spray mist from Studio Calico. Again, trying to bring in the pink more. Ohh, I did ink the doily with Antique Linen and just the tiniest amount of Vintage Photo Distress ink because white would have ben too stark for this card. I rarely, if ever, use white cardstock. When I do, you will know it!

From there, I adhered a large rose die cut and then I layered on the vintage postcard I printed from Beatriz Jennings Etsy shop. A little more stitching – to fully secure it. I added a little pearl flourish from Recollections across the bottom. I used some trim on the edge of the card. I really love this stuff. I need to get it in more colors.

To finish it up, I made a bow from natural jute ribbon and seam binding from Liz’s Paperloft Boutique. I glued one of the butterfly die cuts from the collection in the center. If you look closely, the little girl on the postcard is holding Jack – O – Lantern, so I found the perfect sentiment in All Around Halloween from My Creative Time. I stamped it with Soft Suede ink from Stampin Up. The very last touch was to swipe my Fresh Ink Paper White ink pad to soften the hard edges of the card. I decided to do this instead of Distressing it with Antique Linen. I wanted it to stay kind of light.

Thanks for stopping by! Have a blessed day!

Wednesday, September 19, 2012

Thank You Blossoms

Hello everyone! I had to pop in and share a card with a warm weather card before Fall is full blown. I think if I went with the ideas that pop in my brain, I would be making tons of Halloween and Christmas cards.

I wanted to make a card using my newest favorite color, Wisteria Wonder, and this the result:

DSCF0335

DSCF0331

I have never thought of myself as a purple person, but I am in love with this color. Anyway, I started by stamping my roses from Stippled Blossoms (My first multi-step stamping set, and it’s divine!) from Stampin’ Up. The base layer was stamped with Wisteria Wonder, and the top layer was stamped with Elegant Eggplant.  I stamped them on Vintage Cream cardstock and I cut them out with my detail scissors.

From there, I matted a sheet of woodgrain patterned paper from the My Mind’s Eye Miss Caroline Howdy Doody paper pad onto a piece of Vintage Cream cardstock that I inked with Antique Linen and Vintage Photo. I swear, I use those inks like they’re going out of style. I digress! I took the card front to my sewing machine and did a simple perimeter stitch. I wanted to use a big sentiment with this card, so I pulled out My Creative Time’s Floral Sentiments. I embossed the sentiment with White Zing embossing powder from American Crafts.

Okay, pulling it all together now! I used my Expression to cut a large scalloped border from a piece of script patterned paper from the My Mind’s Eye The Sweetest Thing Lavender pad. If I recall, the scallop is on the Plantin Schoolbook cartridge. I adhered it directly to the card front. I then added some Victoria Trim from Stampin’ Up. Love this stuff, you will be seeing lots of it. And then, I took my flowers that I had stamped and cut out, and some leaves that I diecut from Simply Chartreuse Felt using my Sweet Life dies and layered them onto the card front. I used a combination of dimensional adhesive and hot glue.

The finishing touch was some scrunched seam binding from Liz’s Paperloft Boutique and an Antique Brad from Stampin’ Up. OHH! I also misted the card with Mr. Huey Calico Shine, but I don’t possess the photography skills to show you all. But in person, it has a really nice shimmer. Love that stuff!

Thanks for stopping by! Having a bit of a busy work week, but I do hope to find some time to craft. As always, I wish you a blessed day!

Thursday, September 6, 2012

My Creative Time Designer Challenge

Happy Thursday everyone! September is off to a great start, and I am here with a really sparkly Christmas card to share as part of our new Designer Challenge.

DesignerChallengeBanner

Emma has decided to replace Throwback Thursday in favor challenges that members of the Design Team come up with. This week, Veronica, from VK Create, challenged us to recycle or reuse a product that wasn’t intentionally made to craft with. I decided to incorporate wrapping paper into my card (thanks to the lovely Shar!).

DSCF0324

DSCF0323

DSCF0325

Okay! The really cute paper that you see on the bottom portion of the card is actually wrapping paper. I bought it at Hob Lob . . .  2 season’s ago, I think. I love their paper, it’s really thick and the rolls have so much paper on them.

The top portion of the card is covered in patterned paper from the original My Mind’s Eye Lost & Found collection.  It has glitter, and y’all know how I lurve my glitter! I did a perimeter zig-zag stitch around the top of the card with my sewing machine. I then diecut a border using my Super Star dies with Aqua Mist felt. I sewed that directly to the card (VERY SLOWLY!) where my to papers met.

I used Expression to diecut some snowflakes using the Christmas/Noel Solutions Cartridge. The red snowflake was cut at 2.59” x 2.18,” the aqua and vellum ones were cut at, 1.79” x 2.18.” I used the base snowflake for the red, and the other two are actually the shifted image. I used my spray adhesive to coat them, and I covered them with Martha Stewart Glitter in Garnet & Blue Topaz. SPARKLES, yeah!!!!

For my sentiment, I used one of last new releases, Warm Holiday Fun. The sentiment is what actually inspired the card. Personally, I fell like sentiments should fit in with the design of the card. It’s an integral part, so that’s where the glitter and shiny paper come in.  Anyway, I stamped the sentiment onto a strip of vellum with Versamark Dazzle in Frost, and I embossed it with Pewter Zing embossing Powder from American Crafts. Cut a notch in the end, and adhered it with red line adhesive. I put a glittered brad from Hob Lob through the snowflakes, and adhered it to the card with red line dimensional adhesive. Super cute right?!

Anyway, thanks for coming by. I adore you lovely people. I wish you all a blessed day! Oh, a while back someone wished I would do a layout . . . Monday!!! I’m not a scrapper so wish me luck!

Edited to add: If you want Warm Holiday Fun, I would suggest you order it now, because I talked with Emma, and she mentioned that they keep selling out!

Tuesday, August 14, 2012

Christmas House–MCT Sneak Peek Day #2

Hello crafty friends! I know I have been around, but I kind of needed a bit of a break to get the creative energy flowing again. But, I think I am good for a while now, and it couldn’t be a better time – it’s release week at My Creative Time!

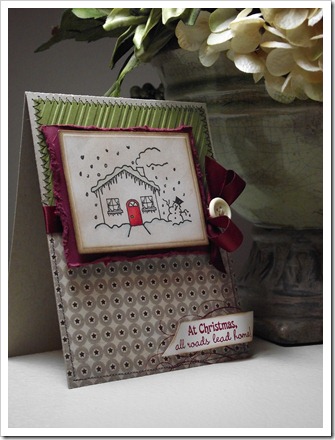
I have a card to share with you using the new Christmas House stamp set. Keep in mind, I do not consider myself an alcohol marker expert, so go easy on me! I’ve recently started acquiring Copic markers, so we will see where this all goes.

DSCF0210 DSCF0211

DSCF0214

When it comes to Christmas, I consider myself a bit of a traditionalist. So, I knew that I wanted to stick with a red and green palette.

I started by stamping the house image onto Stamper’s Select White cardstock with Onyx Black Versafine ink. I cut it out with the second to largest rectangle from my Spellbinders Classic Rectangles Large set. I loved that embossed border, makes it look like an old painting.

Next came the coloring, and believe it or not, I used six markers – three for the door alone! I used a combination of Prismacolor Markers and Copics. I started by adding a small amount of color to the snow covered roofline with PM-193 Mint Cream. Then I used B000, Pale Porcelain Blue, to color in the ground snow. I made very light flicks with the brush tip away from the house. For the door, I colored it in with R24, Prawn, and then I added shading to the right corner with PM-5, Scarlet Lake,  and PM-4 Crimson Red. I also added one little dot of PM-167, Apple Green, to the door handle. That probably sounds way more complicated than it really was, but, I try to give all pertinent information!

I inked the colored image with Antique Linen, Vintage Photo, and Walnut Stain Distress inks. Basically working from lightest to darkest. I added some dimensional adhesive to the back and mounted it on a small block of Scarlet Jewel cardstock from Papertrey Ink. I also used my trusty edge distresser to rough up the edges.

My patterned paper if from the My Mind’s Eye Lost & Found Christmas pad. It measures 4.25” x 3.” I adhered it temporarily to my Kraft base. Then I trimmed a piece of Ripe Avocado to 4” x 2.5.” and embossed it with the Candy Cane Stripes Cuttlebug folder. I adhered it with some Tombo Mono Multi glue and took the base to my sewing machine for some perimeter stitching.

I tied a bow with some Scarlet Jewel satin ribbon. Let me say that this was probably one of the fastest bows I have ever tied. I only mention that because normally it takes me ages to tie a bow with satin ribbon. I threaded a Vintage Cream button with some button twine and tied it around the knot.

I stamped the sentiment from Christmas House with Cherry Cobbler ink from Stampin’ Up. I LOVE that color. Instead of my usual banner end, I opted to trim at a diagonal.

Sneak Peek Giveaway Time!
With all of our Sneak Peek weeks, I love to do FUN giveaways!

All you have to do is leave comments on our blogs! You do NOT have to comment on every blog, BUT if you do, you will just have more chances to win!

SPREAD THE WORD TO THE WORLD ON FACEBOOK about this release & whatever connections you may have! Let us know on "My Creative Time's" FB page here: http://www.facebook.com/pages/My-Creative-Time/364568506334 that you spread the word!

I will randomly pick & announce all winners on Friday, August 17th during the blog hop release happening @ 12:01am PST in my video! GOOD LUCK!

That’s all for today! Thanks for coming by and I wish you a blessed day!

Tuesday, May 15, 2012

Congratulations Grad–MCT Release Week Day 2

Hey there! Welcome to day 2 of the May release week festivities. So, after yesterday’s card went so well, I decided that I would try to continue my clean & simple thing because it truly is a challenge for me.

We’re all showcasing, Here’s Lookin’ at You!, and I must say that if you need to add a set with a great simple and masculine font, then this is for you. Emma covered pretty much any word we use to refer to males.

DSCF0063

DSCF0066

Since we’re smack in the middle of May and June is around the corner, I decided to make a graduation themed card. I started with a  Kraft A2 card base. And, I wavered between using brown or black ink for my sentiments. Generally speaking, I don’t use a lot of black ink for sentiments. My go to is usually Stampin’ Up’s Early Espresso, but I feel like black ink makes a much bolder statement on a CAS card.

I used my grid mat and a ruler to draw a straight line to use a starting point for my sentiments. I used three different sentiment stamps on my card. I have found that preplanning is paramount when making clean cards. After drawing my line in pencil, I stamped, “congratulations,” from Gift Card Sentiments. I then stamped, “grad,” and, “you’re simply the BEST!,” from Here’s Lookin’ at You!

Now, here’s the deal, I had absolutely no trouble stamping the sentiments. But, I messed up on stamping the cap FOUR times! After I finally got it right, I took the card back to my score board and scored lines a fourth of an inch in on each side.

This wouldn't be a party w/o GIVEAWAYS!

With all of our SAMPLES/ SNEAKS this week, Emma likes to do some FUN giveaways!

All you have to do is leave comments on our blogs! You do NOT have to comment on every blog, BUT if you do, you will just have more chances to win!

SPREAD THE WORD TO THE WORLD ON FACEBOOK about this release & whatever connections you may have! Let us know on "My Creative Time's" FB page here http://www.facebook.com/#!/pages/My-Creative-Time/364568506334 that you did so! OR you can just tag me in your post!

Emma will randomly pick & announce all winners on Friday, May 18th during the blog hop  @ 12:01am PST in her video! GOOD LUCK!

Log onto to your Facebook now & lets start spreading word!;)


Thanks for stopping by! As always, have a blessed day!

Monday, March 19, 2012

Monday Madness . . . Imagine That!

Hello all! Happy Monday and welcome to another Imagine That! This week, we’re doing things a little different and we’re making it a color challenge.

color Challenge

Imagine Color Challenge: Black, White, Gray & Pink.

Using the colors above I made this card with some printed patterns from my Imagine the the Teresa Collins Black & White pattern cartridge.

DSCF7978

DSCF7973

As usual, my card is  standard A2. I used True Black cardstock for my base. I cut a white mat from my Georgia Pacific cardstock and sewed the gray and black scroll patterned mat to it with some black there. I adhered that to my card base.

I printed the polka dot pattern on some gray cardstock and I decided it use it to break up the intricate backdrop. But I wanted to do it with a little pattern and one that made sense. Also, I wanted a small accent of pink, so I punch a scallop border with my Scallop Sentiment punch and adhered it to the polka dot strip. By the way, it measures 4.25” x 1.5”. I then adhered that directly to the card, doing my best the center it.

I cut the stock top not from the Imagine in True Black and again with a floral patterned on some pink cardstock. I use dimensional adhesive to adhered them together and set them aside. I use some satin and sheer Offray ribbon to tie a bow on the card. I simply cut a slit on the side to feed the ribbon through. I used VersaMark Dazzle to stamp my sentiment and embossed it with black Zing embossing powder. My sentiment hails from the latest MCT release You Are Perk-fect. I wanted to show that sentiments are versatile.

To bring it all together, I adhered the top notes to the card with more dimensional adhesive, and I used some liquid adhesive to adhere my sentiment on top. I printed some butterflies from Storybook with the Black and White patterns and I decided to include them as well. Some pink rhinestones, Prima flourishes, and silver Shimmer Spritz finished it off!

Thanks so much for coming by. Have a blessed day!!

Friday, March 16, 2012

My Creative Time March Blog Hop!

Hey everyone! It’s been a super busy week, but I’m back with a card to celebrate the March release! If you came to my blog from the wonderful and talened Tracy’s, then you are doing great, if not, start here: My Creative Time.

DSCF7964

DSCF7966

DSCF7967

I decided to go vintage with my card for today. I’ve been trying to work with color palettes outside of my normal box and I have to say that I just love the little touch of turquoise. against the richness of the dark red, I think it makes for an interesting card.

My card is Vintage Cream and is a standard A2. I have a mat of Hawaiian Shores and patterned paper from a Paper Studio pad called The Classics. Lots of timeless patterns and I think it was around ten bucks. Totally worth it. I sewed those together with my sewing machine and some cream thread. I then inked the edges with Antique Linen and Walnut Stain Distress Inks. I used my blending tool and I used the Walnut Stain very sparingly. I didn’t want to overdo it.

I cut the stamp shape from Elegant Edges at 3.75”. I used the wonderful background Emma designed from Coffee Backgrounds and stamped it with Versamark. Initially I was going to leave it plain, but I decided on a whim to go ahead and clear emboss it. I then took the same Distress inks to my stamp mat. My to-go cup is from the AWESOME Coffee Break Set. I diecut it in Vintage Cream and stamped the sleeve with the polka dot background with Cherry Cobbler ink from Stampin’ Up. I love this red. Love it. I inked my cup as well. 

I tied a bow using some Offray grosgrain, one of my favorites. I adhered the stamp mat with my thicker dimensional adhesive dots at an angle, and I adhered the cup with Stampin’ Dimensionals. I stamped my sentiment from You Are Perk-fect on a piece of Vintage Cream with the same Cherry Cobbler ink.


***** BLOG HOP GIVEAWAYS *****

YT24023_6x6_PaperPad_Cover


For the BLOG HOP giveaway each one of us will be giving away a brand new Release Echo Park 6x6 pad of paper! All you have to do is leave a comment and a way for the DT member to contact you if you should win. Each designer will be using 
RANDOM.ORG to pick the lucky winner. Emma and Each Designer will announce their winners on THEIR blogs on Wednesday March 21. So remember you have 16 chances to win! ! All you have to do is leave a comment on ALL blogs for more chances :) 
EASY PEASY!!! GOOD LUCK;)

Blog Hop Line-up

Emma~ http://www.creativetimeforme.com/

Amy ~ http://www.scrappingmommy.com/

Cassandra ~ http://www.ctimz3.blogspot.com/

Cathryn ~  http://inthepinkcathryn.blogspot.com/

Cindy ~ http://cindylee77.blogspot.com/

Glora ~ http://glorascrafts.blogspot.com/

Jeanne ~ http://www.jeannespapercrafts.com/

Katie ~ http://www.craftingwithkatie.com/

Kim ~ http://www.scrapinmomofoneinspiringlittleboy.blogspot.com/

Nikki ~ http://scrappinnavywife.blogspot.com/

Rosy ~ http://sweetdelightspapernmore.blogspot.com/

Shar ~ http://scrapendipity.blogspot.com/

Tracy ~ http://tracyscricutcorner.blogspot.com/

Trell ~ http://polkadotsandpaint.blogspot.com/

Veronica ~ http://www.vkcreate.blogspot.com/

Micia ~ http://yellowbirdcreation.blogspot.com

Thanks so much for coming by! See you for the Imagine challenge on Monday. Have a blessed weekend!!

Monday, February 6, 2012

Monday Madness . . . Imagine That!

Hello everyone! I am here with my first ever Imagine That project! It shouldn’t be a surprise that I made a card for today, but it’s a different card! Papertrey Ink is celebrating their 5th Anniversary this month and Nichole put out a challenge to pick one of the design team members projects that inspired you and make something new. I don’t think I’ve ever mentioned it on my blog, but I LOVE Ashley Cannon Newell. If you’ve never been to her blog, A New Design, I totally recommend it. I think she is just fantastic. So, my project today is inspired by her. Generally, I wouldn’t do a casing type of deal – I like to try and come up with my own ideas and even if I don’t love the resulting project, I post it. I don’t want to get in the habit of using others ideas. Click here to see the card that inspired my project.

DSCF7845

DSCF7848

DSCF7838

DSCF7855

I just realized that I totally used Teresa Collins’s signature color scheme, and it really wasn’t something I did consciously. Initially, I was going to make a spring themed card as a pre-release week appetizer, but I’ve been really into making Valentine’s cards.

Anyway, the jumping point for the design and color scheme came from the Teresa Collins Black & White Imagine cartridge. I printed the bold floral onto some Sweet Blush cardstock from Papertrey Ink. I did not print an entire sheet, instead I printed a 6” x 6” square. I trimmed it to 4” x 5.25” and matted it onto a A2 sized piece of Vintage Cream.

I used my favorite label cut from the Imagine to cut a 3.2” Vintage Cream mat. I then cut the label again in Sweet Blush at 3”. I used my Background Basics: Houndstooth stamp and VersaMark ink to give the label some depth. I built on the pattern by stamping the cherub from 100% Sweetness. I used More Gift Card Sentiments and another piece of Vintage Cream to stamp my sentiment and I embossed it with black Zing embossing powder from American Crafts. Err, backtracking a bit, after I adhered the floral paper to the cream mat, I used my sewing machine to stitch around the edges. Moving on!

To make the pocket, I trimmed a piece of True Black cardstock to 6.5” x 8.5” and scored it at 4.25”. I used a ruler to find the center of the pocket front and marked it on the inside with a pencil. I then drew lines from to corner to that center point and used an X-acto to cut the notched opening (It helps to adhere the cardstock to your cutting mat with repositionable adhesive.). I used white ink and Polka Dot Basics to give the front a little pattern. I then set it off with two rick rack die cuts. I used some black satin to trim the opening of my pocket. I would have loved to incorporate felt, but it wasn’t cutting to my liking. I stitched the pleated ribbon to secure it completely. It is important to sew the pocket together after you decorate it! After that, I stamped the cherub on the heart die from 100% Sweetness and embossed it with black Zing as well. I hope all of this makes sense and doesn’t sound complicated (it really wasn’t)! I know a lot of people like it when I give detailed instructions, so I try to include everything. Lastly, I used my white ink pad and swiped it around the pocket to soften it a bit.

Thanks for coming by! Have a blessed day!

Friday, January 27, 2012

Rosie’s Rocking 45th Birthday Blog Hop!

Hello everyone! Me along with five wonderful ladies are hopping to help Rosie from Scrap Loving Mini’s celebrate her 45th birthday! If you didn’t start with Rosie’s blog, I made her blog title into a link to to get you to the right place.

DSCF7817

DSCF7819

DSCF7824

Here is the card I made for Rosie. I bought this Echo Park collection earlier this month and I was saving it for today. I really hope that Rosie likes it!

The card is a standard A2 and is True Black from Papertrey Ink. The floral pattern and the black polka dot are from the Echo Park For the Record Collection. I used a flourish stamp set that I’ve had for a while now and Bermuda Bay ink to give a backdrop for the sentiment. I use Think Big Favorites #12 for the sentiment. If you can’t tell, it’s embossed with black Zing embossing powder and I realize now that I used regular VersaMark instead of my normal Dazzle in Frost. It makes a difference!

To embellish the card, I tied a double bow with some red sating ribbon and used a variety of yellow and red roses from Recollections and I Am Roses.

Blog Candy

I’ve decided to give the winner a choice of three things for my blog candy! And here are the choices:

  1. $10.00 Gift Card to Jo-Ann
  2. $10.00 Gift Card to Hobby Lobby
  3. A stamp set of your choice from My Creative Time

The only requirement is that you leave a comment here with a way for me to contact you AND leave a comment on Rosie’s blog wishing her a happy birthday. You don’t have to follow me or anything of that nature.

Hop Line Up

1. Rosie - http://www.scraplovingminis.blogspot.com

2. Kari - http://purplefuntastickcreations.blogspot.com/

3. Zeni - http://www.scrappyzeni.com

4. Trell - http://polkadotsandpaint.blogspot.com (you’re here)

5. Rosa – http://craftsbyrosa.blogspot.com (next stop)

6. Lena - http://lenascreations.blogspot.com

7. Gloria – http://www.omascrafts.blogspot.com

That’s all for me today. I wish everyone a blessed weekend, and Rosie I hope you have a wonderfully blessed birthday!

Tuesday, December 6, 2011

Celebrate the Occasion Challenge # 42

If you’re looking for Day #6 of MCT 12 Days of Christmas Hop, click here!

Welcome! This is my second of two projects for today and it’s a card for Celebrate the Occasion. But, before I get into the card, I’d like to announce that CTO is having a Design Team call!! The call will run from today until December 20th. I’ve had an amazing time on the DT, so I definitely encourage everyone to apply. Good luck!

DSCF7578

DSCF7579

We’re celebrating Christmas this week and the requirement is to not use ANY green! I’ve known for a while that I wanted to do a Christmas card with navy, and this is the first one I came up with. I might try again and add a little red or green, we shall see. It’s a standard A2 card. The base is Papertrey Ink Enchanted Evening. I used a TPC Studio stamp set appropriately titled, “Snowflake,” and my trusty VersaMark Dazzle to stamp the background. Love the embossed snowflakes! For the sentiment, I cut two mats from my Imagine – one in DCWV Silver Shimmer cardstock and the other in my regular white cardstock. I took the same stamps, inked them in VersaMark first and then into Bashful Blue ink from Stampin’ Up. I then took the, “Peace,” stamp and followed the same steps, except I used Night of Navy ink. Because I couldn’t help myself, I decided to use clear embossing powder on them as well.

To finish the card, I tied a knot with some grosgrain and added two rhinestones to the center of the Bashful Blue snowflakes. Used the .5” setting on my corner rounder and it was a done deal. Super simple. Does not have to be a snowflake – just an image that works well in the background.

Thanks for coming by! Don’t forget to stop by the CTO blog to get the scoop on applying for the Design Team. Have a blessed day!

Wednesday, November 16, 2011

Cheers! – MCT Sneak Peek Day 3

Hello everyone! We’re on day three of sneak peeks for My Creative Time’s November release. And, today, we’re all showcasing two new sets: Keepin’ It Classy and Classy & Fabulous.  I have to admit that I am in total love with the images from Keepin’ It Classy. Emma’s brother, Mark Villar, hand drew them all.

DSCF7488

I knew I was going to make a card for today’s project, but I have to admit, what I was envisioning, is not the final product. I’m thinking you’ll see that Friday because I still plan to make it. Anyway, my card base is Papertrey Ink Dark Chocolate and is a standard A2. I used Aqua Mist as a mat for my patterned paper. Both papers are from the first Lost & Found collection from My Mind’s Eye. The mat is from the Madison Avenue collection, and the paper that my image is stamped on is from the Union Square collection.

DSCF7484

I used Elegant Edges and my Expression to cut the frame for my focal image. You can find the frame on page 65. I used the oblong and I sized everything with my Gypsy. I stamped my image with Chocolate Chip ink from Stampin’ Up. I then used VersaMark Dazzle to stamp the wine glass and I embossed it with gold Zing embossing powder from American Crafts. I will apologize now for the darkness of my photos. I craft in the middle of the night. I did use Tea Dye and Vintage Photo Distress inks to give everything an antique look, because otherwise, the papers were all too bright (especially the Aqua Mist) but it’s really not that dark in person.

The label that my sentiment is stamped on is from the Teresa Collins Sophisticated cartridge. I am in love with the fonts Emma used for Classy & Fabulous. Just as I did with the wine glass, I embossed the sentiment with gold embossing powder. Generally, I prefer to emboss my sentiments. I don’t do a lot of embellishing on my projects, so I feel like that kind of makes up for it. As I always say, there is a method to my madness and I have a reason behind everything.

DSCF7480

Sneak Peek Giveaway Time!


Listen up "My Creative Time" friends! We are giving all of you an opportunity to win the BEST PRIZES during Sneak peek week with a total of "6" winners to be announced during Friday's Stamp release! All you have to do is leave a comment HERE along w/the rest of the design teams blogs for a chance! There are some AWESOME prizes w/this release!

  1. SPREAD THE WORD TO THE WORLD ON FACEBOOK about this release & whatever connections you may have! Let us know on "My Creative Time's" FB page here http://www.facebook.com/#!/pages/My-Creative-Time/364568506334 that you did so! OR you can just tag me in your post! And . . .
  2. Just comment on ALL of the designers blogs EVERYDAY during Sneaky Peek week! THAT's ALL you have to do to qualify for the BEST giveaways EVER!;)

All winners will "randomly" get chosen and Emma will announce all six winners on Friday, November 18th @ 12:01am PST in her video during the release of this AMAZING new stamp collection & maybe a new die!;) GOOD LUCK! Log onto to your Facebook now & let start spreading word!;)

That’s it for today! I want to thank you all for coming by and I wish everyone a blessed day!

Sunday, October 30, 2011

Happy Halloween!


Hello! I hope everyone had a great weekend. It’s starting to really feel like fall here in North Alabama. It’s what I call hot chocolate weather!

So, I’m totally going to throw out the better late than never excuse for my lack of Halloween cards! Honestly, I really tried. I even bought paper specifically for Halloween, but it’s just not my favorite holiday. This is the first year that I’ve been paper crafting, so I hope that next year will be different.

DSCF7439

I knew going into making this card that it was going to be orange, black, and white. When I saw that ribbon at Hobby Lobby, I got it for the specific purpose of making a Halloween card. The same can be said for the paper. Don’t be surprised if it pops up again, as I really love those patterns. I don’t fall in love with a lot of the Paper Studio designs, but these are both timeless. You really don’t have to worry about it being, “last season.”

DSCF7443The card base is True Black from Papertrey Ink. The orange mat is from the Primary Colors Paper Company pack (sold at Jo-Ann). The cream transition mat is Papertrey Vintage Cream, and the patterned paper is Vintage Black Damask from Hobby Lobby.

DSCF7442The orange mat was stamped with the Stampabilities Polka Dot Background stamp (wood mount) and embossed with black Zing! embossing powder from American Crafts. I used my Martha Stewart Scoreboard to make the rosette. I found that in the absence of a hot glue gun, Zip Dry is a great adhesive for putting together rosettes. The 31st stamp is from Studio G. And to finish it off, I used my white Gelly Roll pen to do some stitching.

DSCF7440I embossed the cream transition mat to tie it in to the main orange mat and to add some texture. I then used my Fiskars Scallop Sentiment punch to create small border to adhere to the bottom portion of the mat. I did some white gel stitching to tie it back to the rosette. There’s a method to my madness!

DSCF7441I tied a bow with the stripped ribbon before adhering the rosette. I used Microsoft Word to generate the sentiment. The font is Blackletter and it was printed at 22 points. I printed it on Vintage Cream and adhered to the same orange used on the rest of the card. I used my square punch to make it into a banner. And, to carry that ,”notched,” element to another portion of the card, I used my pinking shears to trim the ribbon tails.

I might try my hand at another Halloween card later today. I’ve had a rather busy week in terms of work. I went to Jo-Ann 6 days this week. And two of those days, I went twice because I’m currently teaching two cake decorating classes.

I hope everyone has a great week! Thanks for coming by. Have a blessed day.

Saturday, October 29, 2011

My Creative Time Design Team Card


Happy Saturday everyone! My card today is a really special one.  I’m sure everyone knows that October is Breast Cancer Awareness month, and a lot of people know someone that’s been affected by this disease. Well, my dearly departed grandmother died of breast cancer and this card makes me think of her. I think it’s fitting that I make a card in remembrance of her as I use to make all of my art projects for her when I was a kid. Never for my mom, always for my grandmother.

DSCF7434It’s a standard A2 card. The base is white, and I inked the edges with Memento Angel Pink.

DSCF7438Personally, I really like the juxtaposition of the distressed edges and the elegance of the stamps and embellishments. And, I did something very new to me – blending inks. The mat with the damask and paisley background was the same shade as the inside mat. After heat embossing the images with white embossing powder, I used my blending tool and Memento Rose Bud and Angel pink to give the paper a worn effect.

DSCF7437Here’s a close-up of the inking and embossing. I used white Zing! embossing powder from American Crafts. And the bling is a Prima swirl. I’m in love with those.

DSCF7436The sentiment was stamped with my trusty VersaMark Dazzle and embossed with pewter Zing! embossing powder. The ribbons were adhered with hot glue and I used a ribbon slide from Hobby Lobby. 

DSCF7435

I decided to enter my card into the design team call at My Creative Time. I have to say I look forward to her sneaky peek weeks more than Hello Thursday now! Plus, I’ve learned a lot from watching her videos, so I would be super thrilled to design for her.

Thanks for stopping by. Have a blessed day.

Saturday, October 1, 2011

Scaredy Cat!


Hey everyone and Happy World Card Making Day!! I’m here with a Halloween card using the ever reliable Create a Critter. I decided to use the extremely cute cat for my card. I think I have an unofficial goal of using each of the animals on that cart.

And, because I don’t know any better, I made a video to accompany the post. Maybe I’m bored, crazy, or just like the sound of my own voice? Only God knows! Well, honestly, I don’t like the sound of my voice, but I digress.

Now, I realize half the day is gone, but I fell asleep in the middle of editing the video this morning, and I had to wake up and head to work today. But, better late than never!

DSCF7391

DSCF7393

DSCF7394

DSCF7395

That’s my card for today! Thanks for stopping by. Have a very blessed day!